Leave Your Message

How to Paint Bathroom Cabinets

Painting Bathroom Cabinets can transform a tired bathroom without replacing the entire vanity. With careful preparation, even dated oak doors can gain a clean, durable finish. The process involves more than choosing a beautiful color. Moisture, soap residue, fingerprints, and daily cleaning can quickly expose weak preparation.

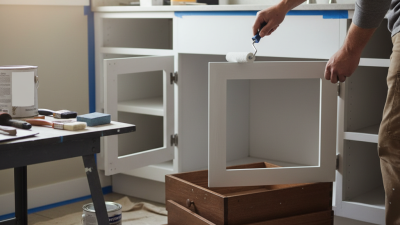
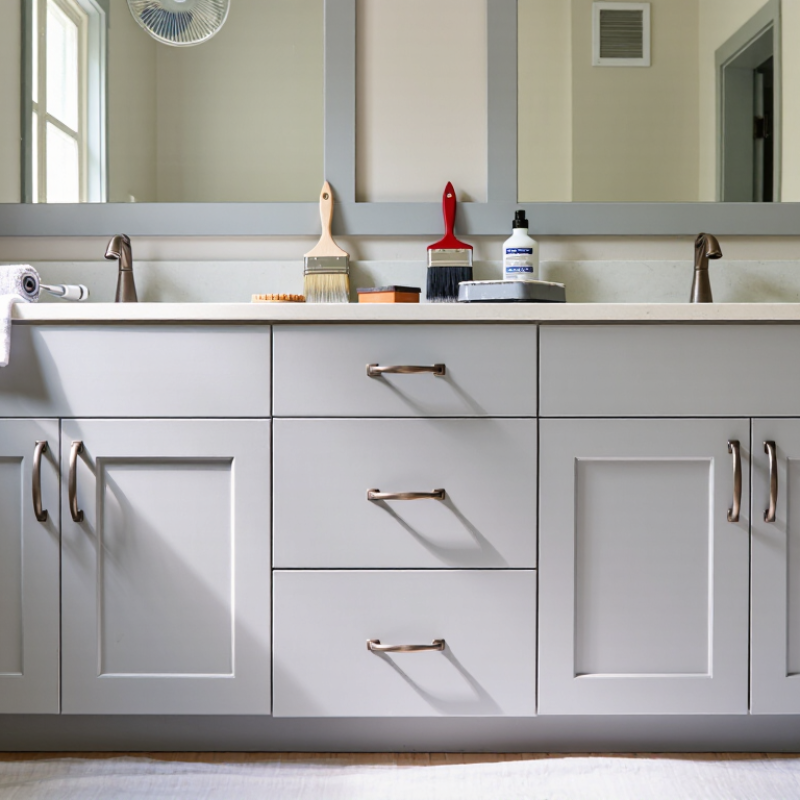
This guide explains how to paint bathroom cabinets with practical methods used by experienced DIY renovators and professional painters. You will learn how to remove hardware, clean greasy surfaces, repair small chips, and create a smooth base for primer. A scuff-resistant cabinet enamel usually performs better than ordinary wall paint. Use a quality angled brush for edges and a small foam roller for flat panels. Thin coats matter. Thick paint may look faster, but it often dries with drips, ridges, or soft spots.

Ventilation is important. So is patience. Allow each coat to dry according to the product label, even when the surface feels dry. I have found that rushing the reassembly stage causes many avoidable scratches. Still, no method is perfect. Some cabinets contain swollen particleboard or peeling laminate, and paint may not repair serious water damage. Inspect the vanity honestly before beginning. A small test area behind a door can reveal adhesion problems, color changes, or an unsuitable finish. With realistic expectations and steady preparation, Painting Bathroom Cabinets can produce a refreshed appearance that holds up to everyday bathroom use.
How to Paint Bathroom Cabinets

Assess Moisture and Ventilation: Maintain 30–50% Indoor Relative Humidity

How to Paint Bathroom Cabinets

Assess Moisture and Ventilation: Maintain 30–50% Indoor Relative Humidity

Painting bathroom cabinets starts with the air, not the brush. High humidity slows drying and can trap moisture beneath fresh coatings. Use a digital hygrometer to check the room before preparation. Aim for 30–50% indoor relative humidity during cleaning, painting, and curing.

Run the exhaust fan during showers and for at least 20 minutes afterward. Keep the bathroom door open when practical. Wipe condensation from mirrors, walls, and cabinet surfaces. Moisture wins. I once painted a cabinet in a room that felt only slightly damp. The finish remained soft near the sink for days. My mistake was trusting comfort instead of measuring humidity.

Remove the doors and hardware before painting. Clean grease and soap residue with a suitable degreaser, then let every surface dry completely. Lightly sand glossy areas for better adhesion. Apply thin coats, allowing the recommended drying time between them. Wait longer if the humidity rises above 50%. Do not close the doors until the coating has cured enough to resist sticking. A small fan can improve air movement, but avoid blowing dust onto wet surfaces. Check the humidity again each day. Paint may look dry while remaining vulnerable underneath. That extra waiting period feels inconvenient, yet it often prevents peeling, tackiness, and visible brush marks.
Remove, Clean, and Sand Cabinets with 120–180 Grit Abrasive

How to Paint Bathroom Cabinets

Remove the cabinet doors, drawers, and hardware before painting. Label each piece with painter’s tape, even if the layout seems obvious. Bathroom cabinets often collect invisible oils, hairspray, and soap residue. Wash every surface with warm water and a mild degreasing cleaner. Use a separate cloth for rinsing, then allow the wood to dry completely. Moisture trapped in joints can weaken later coats.

Once dry, sand with 120-grit abrasive to remove gloss and smooth raised edges. Follow with 180-grit abrasive for a more even surface. Sand by hand around profiles and corners. A sanding block helps keep flat panels level. Do not press hard on veneer or engineered wood. You can remove too much material quickly. I once rushed this step and created a shallow groove near a hinge. It was repairable, but prevention would have been easier. Wipe away dust with a clean, slightly damp cloth, then let the surface dry again.

Tips: Keep the abrasive moving. Check the surface under bright side lighting. Glossy patches show where more sanding is needed. Wear eye protection and a suitable dust mask, especially in a small bathroom. Leave doors flat while sanding, and support them on clean blocks. If water stains or swollen edges remain, stop and repair them before applying primer. A smooth finish begins with patient preparation, not extra paint.

Prime Bare Wood and Laminate Using a High-Adhesion Bonding Primer

Bathroom cabinets take constant moisture, so paint failure often starts before the color coat. Remove doors, drawers, and hardware, then label each piece with painter’s tape. Clean every surface with a degreasing solution, especially around handles and lower edges. Rinse away residue and let the cabinets dry completely. Bare wood can absorb primer unevenly. Lightly sand it with fine-grit paper, then remove dust with a lint-free cloth. Laminate needs a dull, clean surface. Use a light sanding pass; cutting through the thin layer creates a bigger repair.

Choose a high-adhesion bonding primer made for both bare wood and laminate. Apply a thin, even coat with a quality synthetic brush or small foam roller. Do not flood the corners. It matters. Keep the room ventilated, and follow the product’s stated drying and recoating times. A primer may feel dry while remaining soft underneath. That mistake can cause scratches when the cabinet is reassembled. For glossy laminate, test the primer on an inconspicuous area first. If it beads or wipes away, the surface needs more cleaning or gentle abrasion.

After drying, inspect the cabinet under bright side lighting. Fill tiny wood imperfections, sand raised fibers, and spot-prime repaired areas. I once rushed this stage and saw every roller mark after painting. That was avoidable. Apply two light finish coats rather than one heavy coat, allowing proper curing between them. Handle the doors carefully for several days, because bathroom humidity can slow final hardening. Check for sticking before daily use.

How to Paint Bathroom Cabinets — Prime Bare Wood and Laminate Using a High-Adhesion Bonding Primer
Project Stage Bare Wood Cabinets Laminate Cabinets Recommended Method Typical Drying or Wait Time
1. Inspect the Surface Check for raised grain, cracks, loose joints, and exposed end grain. Check for peeling edges, swollen particleboard, chips, and loose laminate. Repair damaged areas before cleaning or priming. Replace severely swollen or delaminated panels when necessary. Allow repairs to set according to the filler or adhesive instructions.
2. Remove Hardware Remove doors, drawers, hinges, pulls, and adjustable shelves. Remove doors, drawers, hinges, pulls, and adjustable shelves. Label each part and store screws in separate containers to simplify reassembly. Usually 30–60 minutes, depending on the number of cabinet parts.
3. Clean and Degrease Remove dust, soap residue, skin oils, and any polish or wax. Thoroughly remove grease and residue because contamination can prevent primer adhesion. Use a suitable household degreaser, rinse if required by its directions, and let the surface dry completely. Approximately 30 minutes to several hours, depending on ventilation and moisture.
4. Sand the Surface Lightly sand with fine to medium-fine abrasive paper to smooth the grain and remove loose finish. Lightly abrade the glossy coating until the sheen is reduced. Avoid sanding through the laminate. Use even pressure, then remove all sanding dust with a vacuum and a clean, lint-free cloth. Approximately 15–30 minutes per door, depending on size and condition.
5. Apply Bonding Primer Apply a thin, even coat to the wood, edges, routed details, and repaired areas. Apply a high-adhesion bonding primer designed for difficult, smooth surfaces. Use a quality synthetic brush for details and a short-nap or foam roller for broad, flat areas. Avoid heavy buildup. Commonly 1–4 hours before recoating; follow the product label.
6. Inspect and Sand Primer Lightly smooth raised fibers, drips, or brush marks after the primer has dried. Check for missed glossy spots, thin coverage, or areas where the laminate remains visible. Remove dust after sanding. Apply a second primer coat if the surface is uneven or adhesion is uncertain. Allow the primer to dry fully before sanding or recoating.
7. Apply Cabinet Paint Apply two thin coats for consistent color and durability. Apply two thin coats, keeping the film level to minimize roller texture and brush marks. Use a paint formulated for cabinets, trim, or other high-use interior surfaces. Maintain a wet edge while painting. Often 4–24 hours between coats, depending on the paint, temperature, humidity, and airflow.
8. Recoat and Cure Inspect under good lighting and touch up thin areas or missed edges. Confirm that the coating has bonded evenly, especially around handles and door edges. Do not close doors tightly or reinstall hardware until the finish is dry enough to resist sticking. Light handling may be possible after about 24 hours; full hardness can take several days or longer.
9. Reassemble Reinstall hinges, doors, drawers, shelves, and pulls carefully. Reinstall parts without dragging them across adjacent painted surfaces. Adjust hinges and drawer fronts so doors do not rub while the finish continues to cure. Use care during the first week, when many coatings are still gaining hardness.
10. Maintenance Clean with a soft cloth and mild, non-abrasive cleaner. Wipe spills promptly and avoid abrasive pads that can damage the coating or expose the laminate. Keep bathroom ventilation operating during and after showers to reduce moisture exposure. Routine cleaning as needed; inspect high-touch areas periodically.
Key Safety Notes Provide ventilation, wear appropriate eye and respiratory protection during sanding and spraying, keep products away from flames, and follow the safety and drying instructions on every product label.

Apply Two Thin Paint Coats at 50–90°F, Following Manufacturer Recoat Times

Painting bathroom cabinets successfully depends on temperature, patience, and thin application. I aim for a room temperature between 50 and 90°F before opening the paint. Cooler conditions can slow drying, while excessive heat may leave brush marks. I remove the doors, label each hinge, and clean every surface thoroughly. Soap residue and hair products can weaken adhesion. After light sanding, I wipe away all dust with a clean, slightly damp cloth.

I apply the first coat with a quality brush or small foam roller. Thin coats dry more evenly and reduce drips around edges. I avoid forcing paint into hinges, screw holes, and drawer gaps. The surface may look uneven at first. That is normal. I once added paint to a dull area too soon, creating a soft patch that needed sanding again. Now, I follow the manufacturer’s stated recoat time, even when the cabinet feels dry.

The second coat should be equally thin. I inspect the doors under bright side lighting before moving them. Bathroom humidity can extend drying time, especially after a hot shower. I keep the room ventilated without creating a dusty airflow. Gentle handling matters. Fresh paint can feel dry while remaining vulnerable underneath. I leave doors and drawers separated until the recommended curing period passes. Some edges still need correction. That is better than rushing them back into service.

How to Paint Bathroom Cabinets

Apply two thin paint coats at 50–90°F, allowing the manufacturer’s specified recoat time between coats.

The chart shows the stated application-temperature boundaries and the 70°F midpoint as a practical reference. Always follow the paint label for recoat and curing times.

Allow a 7-Day Cure Before Heavy Use and Reinstalling Cabinet Hardware

How to Paint Bathroom Cabinets

Allow a 7-Day Cure Before Heavy Use and Reinstalling Cabinet Hardware

Painting bathroom cabinets requires patience, especially after the final coat. Remove the doors, label each hinge, and clean every surface thoroughly. Sand glossy areas until they feel evenly dull. Repair chips before applying a suitable primer and two thin paint coats. Thin layers dry more evenly and reduce drips around corners.

Do not judge the finish after one night. It may feel dry, yet moisture, friction, and cleaning products can still damage the surface. Allow at least seven days for the paint to cure before heavy use or reinstalling cabinet hardware. Keep doors slightly open during this period. Maintain gentle airflow, but avoid strong heat, which can cause uneven curing. I once reattached handles too soon, and the fresh finish showed faint pressure marks. Waiting would have prevented that mistake.

Tips: Place painted doors on padded supports, not directly on cardboard. Test a hidden edge before using cleaner. After seven days, reinstall hardware carefully by hand. Do not overtighten screws. Check the surface for tackiness or soft spots first. If either remains, wait longer. Bathroom humidity varies, so the calendar is a guide, not a guarantee. Allow extra curing time in a cool or poorly ventilated room.