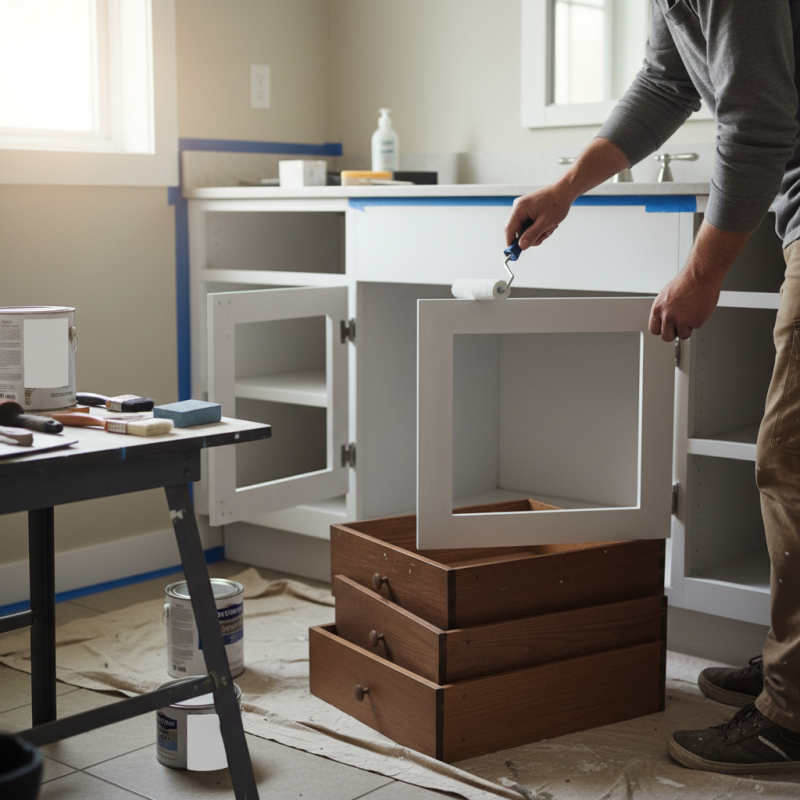
How to Paint Bathroom Cabinets Like a Pro?
If you’re considering refreshing your bathroom, painting bathroom cabinets is a great option. With the right techniques, you can achieve a professional look without breaking the bank. Many homeowners hesitate, worried about the mess and skill involved in this project.
Painting bathroom cabinets requires attention to detail. Start with a clean surface to ensure an even finish. Choosing the right paint quality is crucial. It affects durability and visual appeal, ensuring a lasting transformation. While it may seem straightforward, mistakes can lead to disappointing outcomes.
Reflecting on past DIY experiences, even pros can miss a step. A rushed prep can ruin your result. It’s essential to take your time and be patient. Focus on each phase, from sanding to priming. Embrace the learning process, as it adds to your skills for future projects. Remember, imperfect results can provide valuable lessons for next time.
Choosing the Right Paint for Bathroom Cabinets
Choosing the right paint for bathroom cabinets is crucial. Bathrooms are humid places, and not all paints can withstand this environment. Look for paints that are specifically labeled as moisture-resistant. These types will endure steam and humidity better than standard paints.
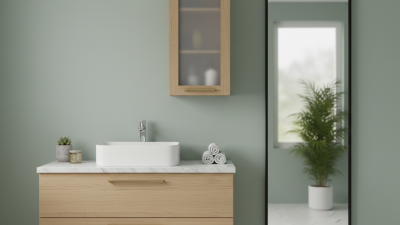
When selecting a finish, consider semi-gloss or satin options. These finishes are more durable and easier to clean. They also help reflect light, making your bathroom look brighter. Remember, a beautiful finish needs a good primer. Don't skip this step, as it helps the paint adhere well and improves longevity.
Tips: Always test paint in a small area first. This helps you see how it reacts to bathroom conditions. Also, consider the color. Lighter shades can expand the space visually, while darker hues may create a cozy feel. Reflect on the look you wish to achieve, and don't be afraid to adjust your choices if something feels off.
Preparing Your Bathroom Cabinets for Painting
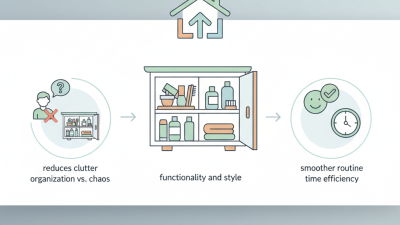
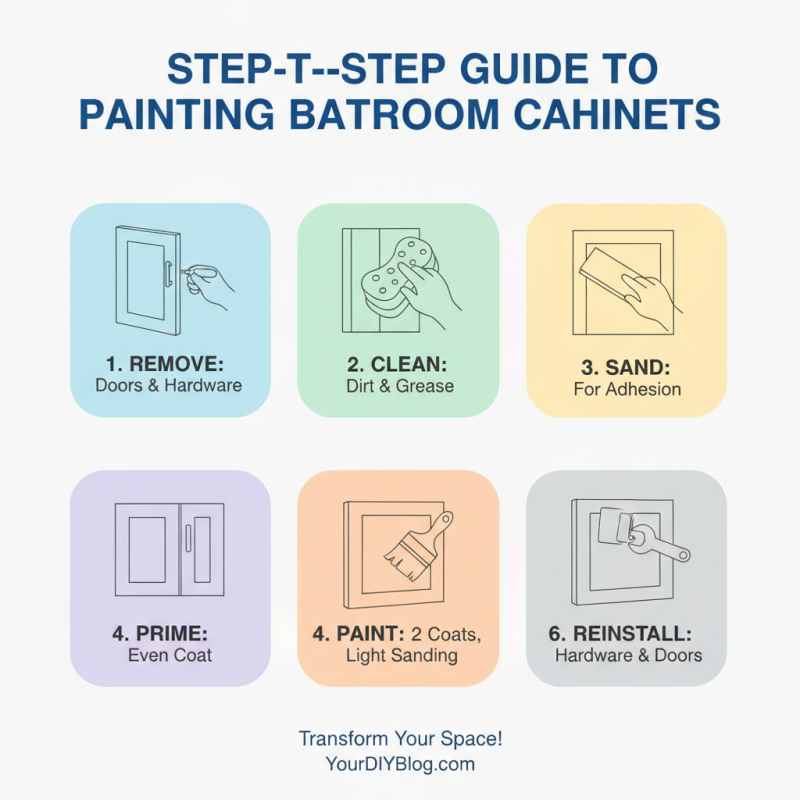
Preparing your bathroom cabinets for painting is crucial. Start by emptying the cabinets completely. Remove all items, ensuring a clear workspace. This step allows for thorough cleaning and inspection.
Next, clean the surfaces with a mixture of water and vinegar. This removes grease and grime. Pay close attention to corners and edges. After cleaning, dry the surfaces completely. Moisture can ruin your paint adhesion.
Now, remove hardware like knobs and hinges. Label them to avoid confusion later. Sand the cabinet surfaces lightly to create a texture for the paint to grip. It’s easy to overlook this, but proper sanding makes a big difference. Wipe away dust particles after sanding, ensuring a smooth finish.
Applying Finishing Touches and Sealants
When painting bathroom cabinets, applying the right finishing touches and sealants can elevate your project. The final coat determines the durability of your hard work. Research shows that over 70% of bathroom cabinetry issues arise from improper sealing. Choosing high-quality sealants ensures protection against moisture, a common issue in bathrooms.
Selecting a sealant that is resistant to mold and mildew is crucial. A study indicated that bathrooms treated with such sealants last up to 50% longer without requiring repairs. In addition to the sealant, consider the application technique. Use a brush for corners and detailed areas, while a roller can cover larger surfaces quickly. This dual method enhances the professional finish.
Many DIY painters overlook the importance of drying times. Sealants require adequate curing before use. Rushing this process can lead to bubbling or peeling. It might be tempting to finish quickly, yet patience leads to better results. Test small areas if unsure about the sealant's effectiveness. Refining your approach will improve outcomes and increase the longevity of your painted cabinets.
Maintaining Your Newly Painted Bathroom Cabinets
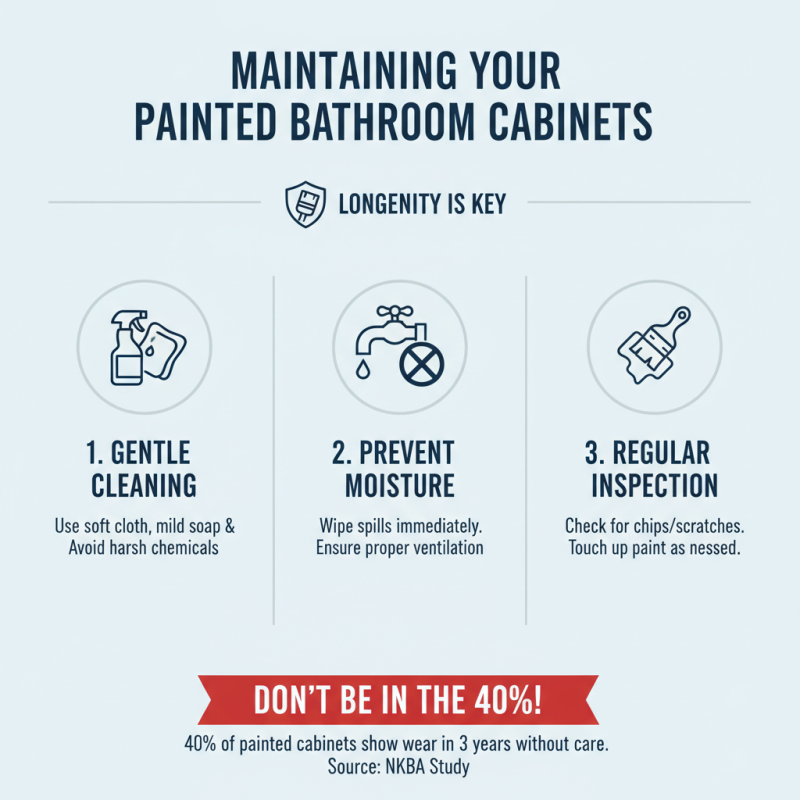
Maintaining your newly painted bathroom cabinets is crucial for longevity. A high percentage of homeowners overlook regular upkeep. In fact, a study by the National Kitchen and Bath Association found that 40% of painted surfaces show signs of wear within three years without proper care.
To protect your cabinets, regularly wipe them down with a soft, damp cloth. Avoid abrasive cleaners that can strip paint. Instead, use mild soap and water. This simple practice can significantly extend the life of your cabinets. Additionally, humidity plays a key role in the bathroom. Ensure proper ventilation to prevent moisture buildup, which can lead to peeling or mildew.
Inspect your cabinets quarterly for any damage. Small chips can be repaired easily if addressed quickly. Waiting too long can lead to more extensive restoration work. It’s essential to adopt a proactive maintenance approach. Remember, a little effort goes a long way in preserving the beauty and functionality of your painted bathroom cabinets.